Tutorial • Rounded Webcam in OBS
How to set up a Rounded Corner Webcam (with drop shadow)
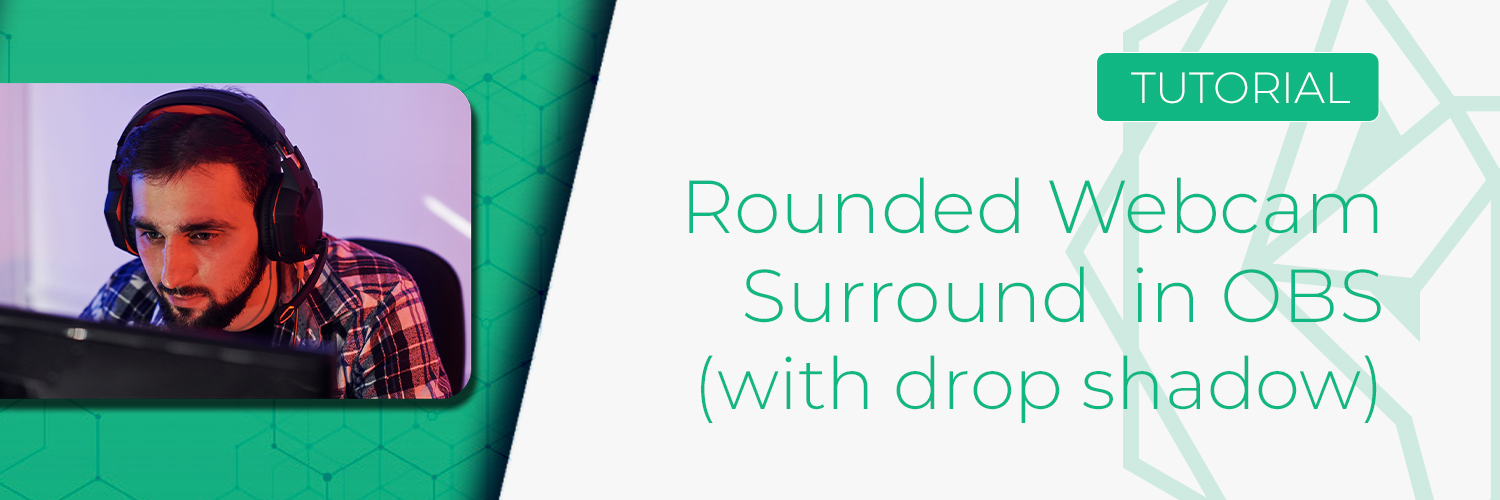
How to set up a rounded corner webcam with a drop shadow in OBS
If you've seen any Twitch streams over the past year you've probably seen the trend towards minimal design.
One of the more interesting design elements to come out of this trend is the rounded webcam overlay, sometimes given a shadow underneath to make it "pop" out of the screen more.
The best part is, the setup for this style of webcam surround is relatively easy as long as you know a few basics of OBS and filters. Let's take a look at how to get this super clean webcam effect set up in OBS.
We've prepared a download package with all the files you'll need for this tutorial. You can download it for free from our Gumroad shop here.
Overview
- Download the Drop Shadow Webcam Pack here
- Create a new Scene in OBS called Webcam Surround
- Add your Webcam to the scene in a 16:9 aspect ratio
- In your Webcam Filters, add an Image Mask/Blend filter
- Select the relevant Alpha Mask image from the downloaded Pack
- Add an Image to the Webcam Surround scene
- Select the relevant Drop Shadow image from the downlaoded Pack
- In your main scene, add a new Scene source
- Select your Webcam Surround scene
Setting Up the Webcam Scene
To make things easy, we're going to use a feature in OBS called Scene Nesting. This is where we create our webcam styling in a separate scene in OBS, then we can include our Webcam scene in whichever other scenes we want.
Creating the new scene
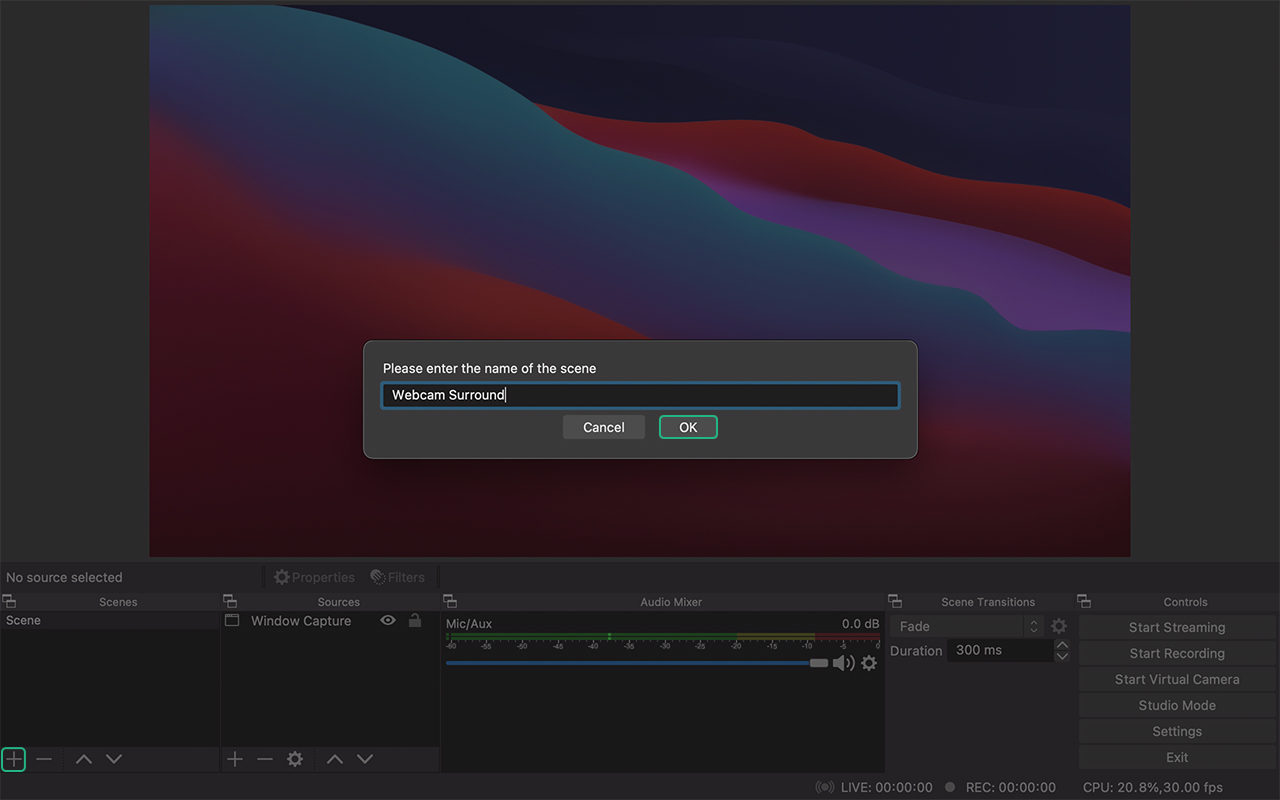 Click the [+] icon in the Scenes tray, and call the new scene 'Webcam Surround'
To create our Webcam scene, we're simply going to click the [+] icon at the bottom of the Scenes tray in OBS. When the popup appears asking you to name your new Scene, call it something like 'Webcam Surround'.
The new scene will be created and OBS should automatically switch you to the new Webcam Surround scene.
Add our Webcam Source
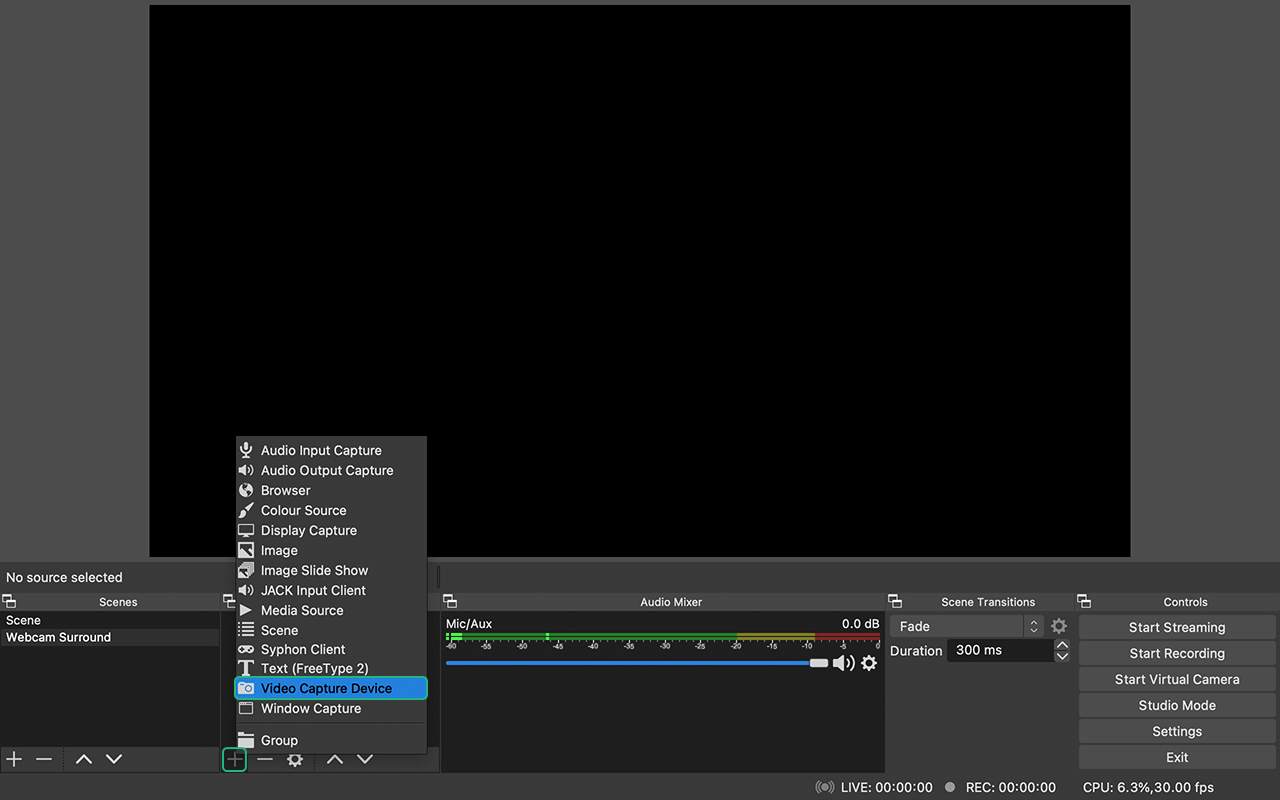 Click the [+] icon in the Sources tray and select 'Video Capture Device'
Next, we need to add our webcam to our new scene. To do this, we're going to click the [+] button at the bottom of the Sources tray. In the menu that appears, select the Video Capture Device option.
In the New Source popup, make sure Add New is selected and give your webcam source a name (we recommend 'Webcam', for obvious reasons).
In the next popup window, select the webcam device you want to use and make sure the output resolution is set to 1920 x 1080 or 1280 x 720
You can use a different resolution if you want, but bear in mind the alpha mask is set up in a 16:9 aspect ratio, so you might need to manually resize things to get it to look correct.
Apply the Image Mask
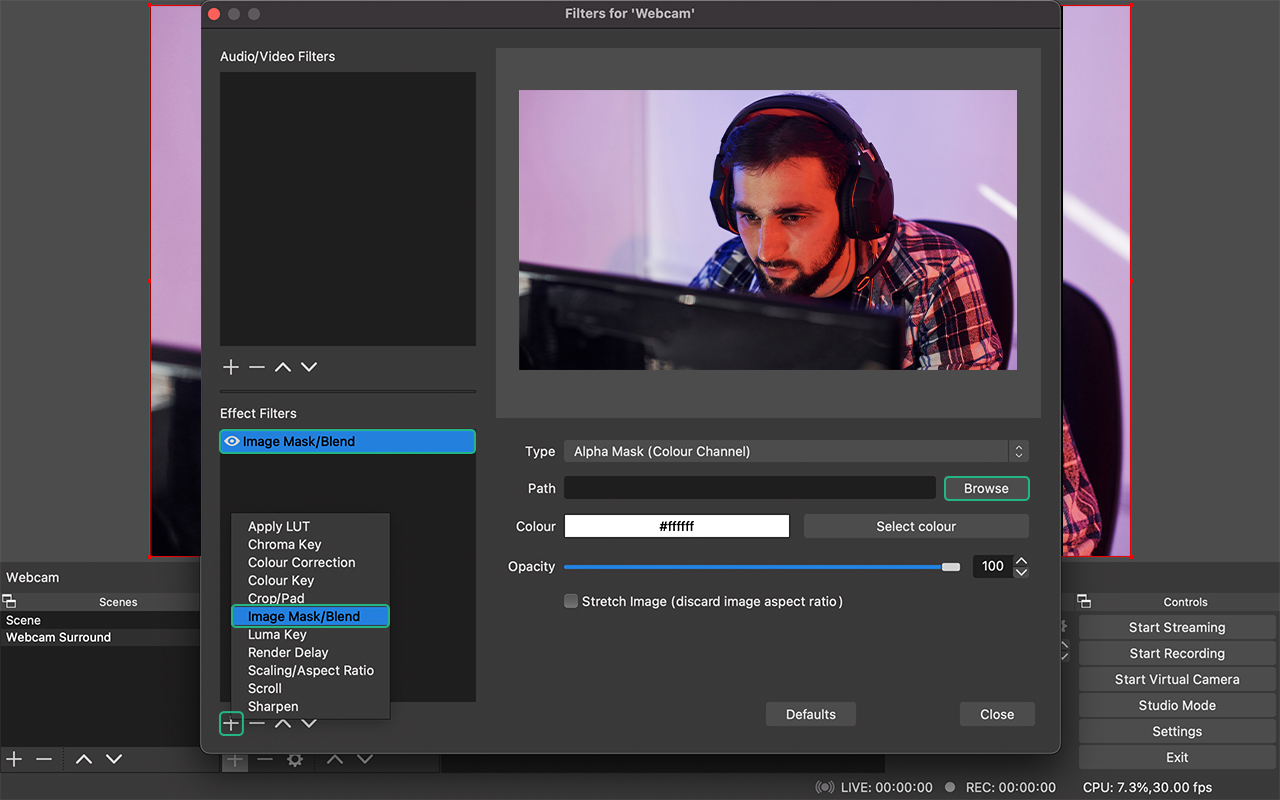 In the Filters menu, add a new Image Mask/Blend filter
To get the rounded corners on our webcam surround, we're going to use an Image Mask/Blend filter on our Webcam source. To do this, right-click on the Webcam source in the Sources tray and select Filters.
In the Filters menu, click the [+] icon located under the Effect Filters list. In the popup menu, select the Image Mask/Blend option.
The only option you need to worry about in the Image Mask properties is the Path. Click Browse and select the Alpha Mask image file from the downloaded pack, then click Close.
In the downloaded pack you'll find 2 folders, one for a left shadow and one for a right shadow. Make sure you select the correct Alpha Mask image for whichever shadow you want to use.
Add the Drop Shadow
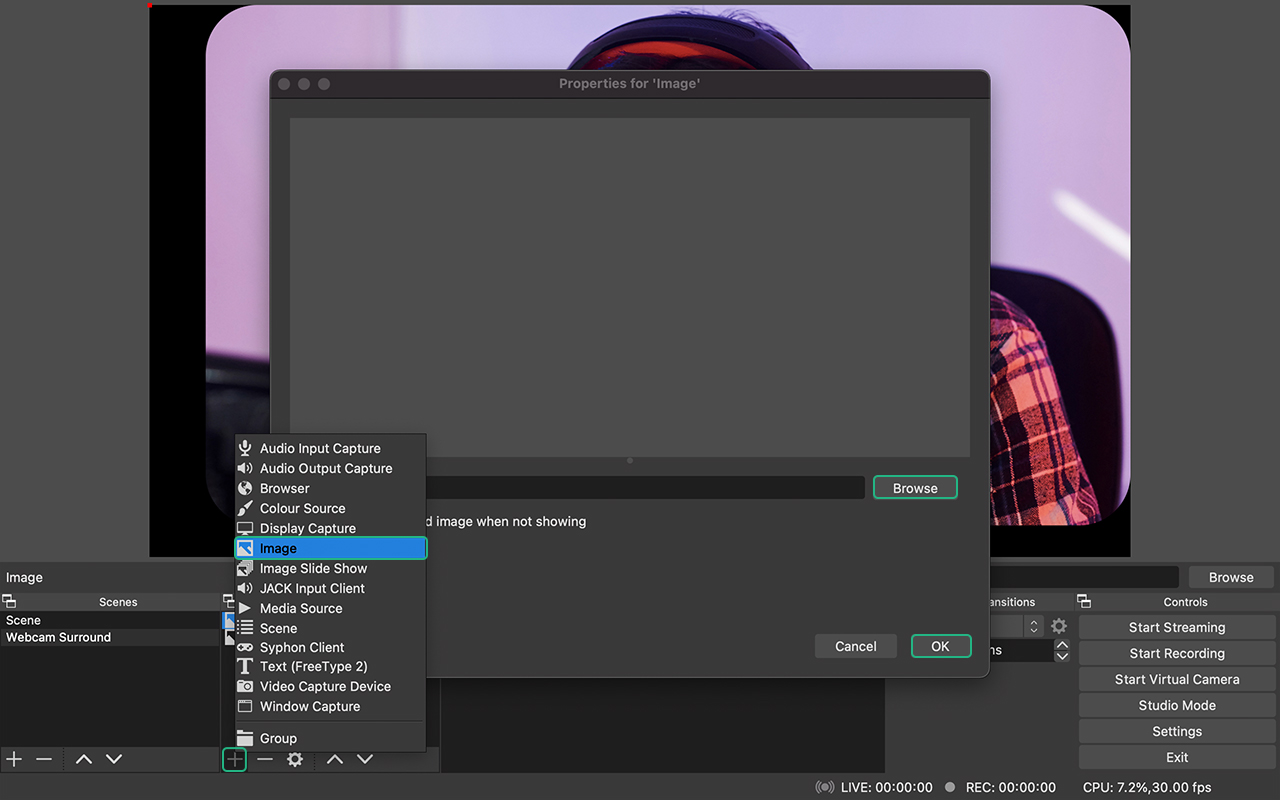 Click the [+] icon in the Sources tray and select 'Image'
To add the drop shadow effect, we're simply going to use a PNG image layered behind our Webcam source that's been set up to match the radius of our webcam corners.
To do this, click the [+] icon at the bottom of the Sources tray and this time select Image. Call your image something like 'Webcam Shadow' and click Ok.
In the image properties, click Browse and select the Webcam Surround • Shadow PNG image for whichever version of the shadow you're using (left or right).
The image should be applied to the scene and automatically position itself in the correct place to appear as a shadow below your webcam.
To finish up, click the [V] arrow at the bottom of the Scenes tray while you still have your Webcam Surround layer selected to move it below the Webcam itself.
Add Our Webcam to Our Main Scene
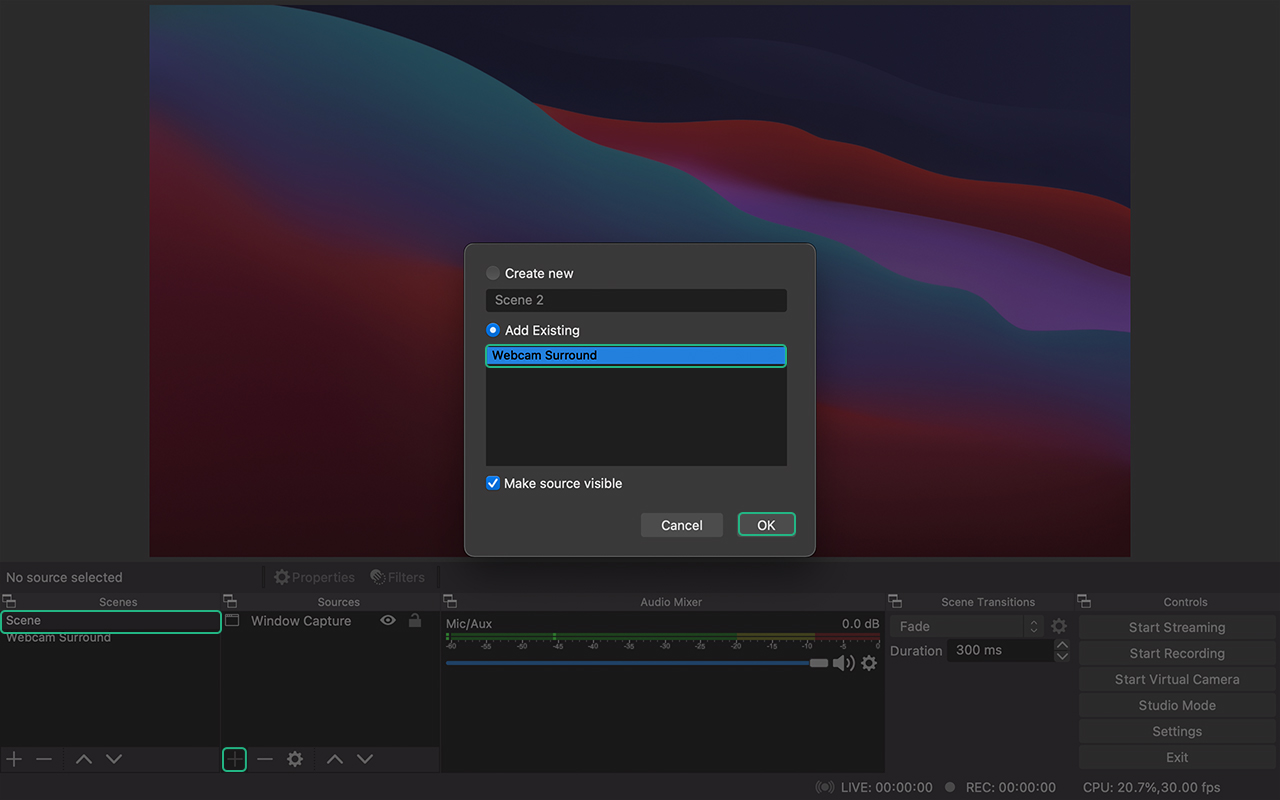 In your main scene, click the [+] icon in the Sources tray and select 'Scene'
This is the easy part. Now that your webcam is set up in it's own scene, all you need to do is include that scene wherever else you want in your setup.
To do that, select the scene you want to add your webcam to in the Scenes tray, then click the [+] icon at the bottom of the Sources tray.
In the popout menu, select Scene. In the scene selection, make sure Add Existing is selected and choose the Webcam Overlay scene we've just created and click OK.
Final Result
 The final result of our Webcam Surround
Our webcam, complete with rounded corners and drop-shadow will be added to our scene. You can resize or move your webcam around to position it wherever you like in your scene.
And that's it, we're done! You can add your new rounded corner webcam to any scene you like by simply adding the Webcam Surround scene as a Source wherever you need it.
Did you try out this tutorial? Leave a comment below and let us know how you got on!
No comments... yet!